Let's Talk about Guys, Girls and Sex
Menu
BLOG
|
The Thirst Crow Experiment
On the first day of Science Club we tried out a myth-busting activity based on the video above. The materials required - water, a transparent container and stones are available everywhere. And most of my students knew and believed the story of the thirsty crow. Aim: Is the story of the thirsty crow true? In a container that is quarter-filled with water, will the water rise to the top when we fill the container with stones? Kids appreciated that their hypothesis does not have to be correct. Nor does it need to be corrected in their notebooks. It helped that most of the class suggested a hypothesis that did not turn out to be correct. They also came up with different variations (using smaller marbles instead of stones, using different volumes of water) that we tried out as separate experiments. Our discussions veered into the topics of Archimedes’ principle, buoyancy, volume of stones, volume of space between the stones (or marbles). Everyone seemed to have an opinion. I think this is a great introductory activity to get middle school students to appreciate the purpose behind many science activities – to doubt, question and test our prior ‘knowledge’.
1 Comment
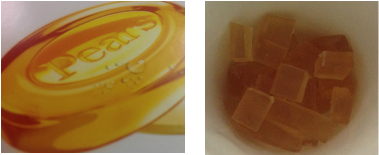
We have been making soaps at home. All you need is a bar of Pears soap, a mould and microwavable container with a microwave.
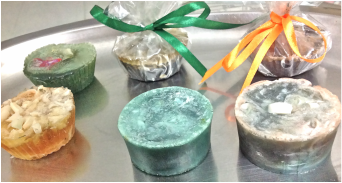
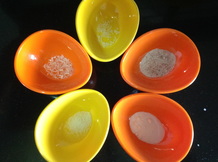
We wanted to make exfoliating soaps- that is, soaps that are rough and will scrub our skin. So we added various scrubs to our soap like salt, used coffee grinds, oatmeal, lemongrass leaves, orange zest, and green tea leaves. Each soap bar had one or two of these. It’s an easy project to do at home. Adult supervision is required for this project. Molten soap is VERY HOT. Method 1. Chop the Pears soap into small pieces. One cannot use all types of soaps as most types do not melt easily.
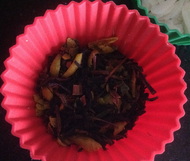
2. Get your mould ready with your preferred additives. For moulds we used paper cups and Silicone cup cake moulds. But one could also use chocolate moulds, used tetra packs (the small Appy, Frooti packs). We placed our salt, tea leaves etc in the mould.
3. Heat the soap in a microwavable container for 10-50 seconds. We kept checking the soap after every 10 seconds to see if it had melted. If you microwave the soap too long then it will melt, boil and overflow.
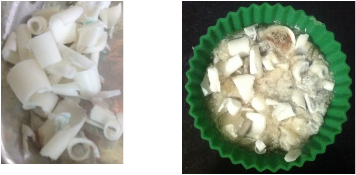
4. Pour the melted soap into the molds and mix. We wanted different colored soaps so we added some food coloring at this point. This step has to be done very quickly as the soap becomes lumpy as it starts to cool down. 5. Wait for the soap to cool down and solidify. This can take quite some time. I left mine for 3-4 hours. 6. Tear the mould (for paper cups) or just take the soap out of the silicone moulds. 7. Your soap is ready for use! Optional My daughter wanted to decorate her soap with white soap curls. So she used a peeler to peel some curls from a white bar of soap. She added the curls to the top of the soap as it was solidifying.
It's a really easy project. The soap with coffee grinds has a great aroma to start the morning. And it feels nice to be using soaps with such exotic names as :
Orange Zest and Green Tea Soap Sea Salt and Lemon Grass Soap Oatmeal with Coffee Soap
One method that scientists use to figure out what metal ions are present in a compound is the flame test.
In the attached video a science student is demonstrating to Vivek the different colours that are emitted when compounds containing different metal ions are heated on a platinum wire in a non-luminous flame. Why? When heated, the electrons of the metal ions get excited to a higher energy level. When the electrons fall back to lower energy levels they emit light of specific wavelengths. |
AuthorSwati Shome and her random thoughts. Archives
June 2016
Categories |
 RSS Feed
